Demystifying containerization with docker
Engineering
Nov 26, 2025

Whether you’ve been using docker containers for a while now or you’re a beginner “containerizer”, there’s still the possibility that you see it as some complex process that you have to follow strict guidelines to avoid errors. And when the errors show up (they will! haha), you get so worked up! No more of that! It’s time to get comfortable playing with containers. Let’s go!
To do:
Create a simple NodeJS API
Create a Container image that will run it
Run the Container image with Docker
Run another container that is just a Linux box and run some Linux commands to feel at home.
Compose the two Containers (like we’re arranging music) with docker-compose
Make some API requests from the Linux box to the API
NodeJS API
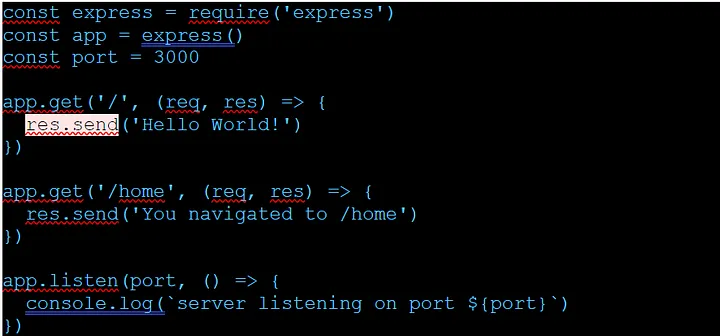
Create a file, name it server.js and add the code snippet below to it. To run it, use the command node server.js
It failed? Oh you don’t have node installed? That’s a bummer, but don’t worry. You don’t have to install node. Stay with me.
Create a docker image
I have created a folder for this and it currently has one file: server.js .
Add another file; Dockerfile without any extension. Put the code below in it and let’s talk about where we are now.
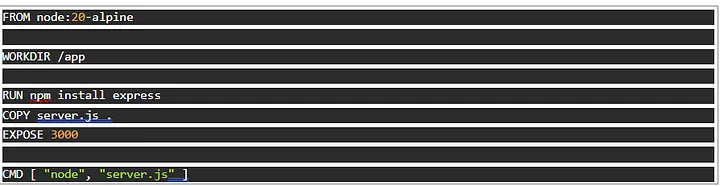
What we have done is to create a Dockerfile that has instructions for creating an image. Think of an image as an ubuntu ISO file or a windows bootable flash drive. It allows us to install Ubuntu or Windows.
The first line FROM node:20-alpine simply means we have an existing image which is a small Linux installer with NodeJS preinstalled!
There are other commands that follow, which allow us to RUN Linux commands at “runtime”, that is, when we install and start the server.
From top to bottom, this is what we are doing when we run the instructions to create the image, and we run the image to start a “container”:
Start a Linux server with node installed
Change directory to /app folder
Install express
Copy our file server.js from our local machine to the server we just started
Open port 3000
start the node server
Think of a container as a running ubuntu server (whereas the image is what we install to get it running).
Run the docker image
With these two commands, we will use the Dockerfile to create an image and run the image to get a running container:

Make sure you run it in the directory we are in. The -t flag lets us tag the image with a name.
Verify the image exists with the command docker image ls
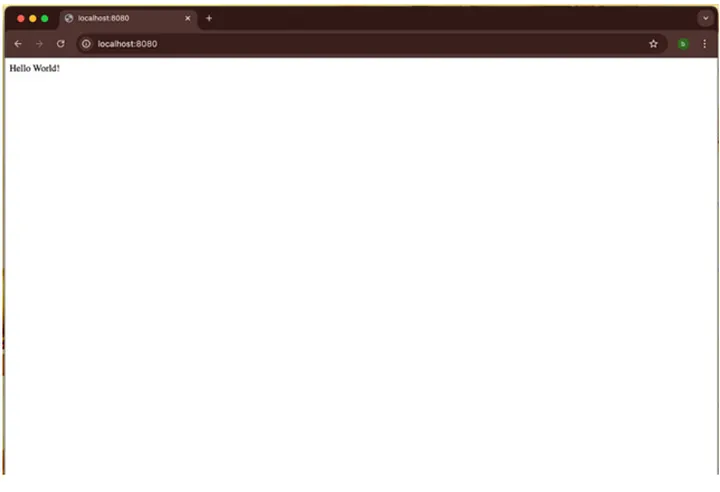
The last command runs the image and connects its port 3000 to your local machine’s port 8080. Now check localhost:8080
Good job so far!
Run another container that is just a Linux box
Create another file called ubuntu. Dockerfile and add the code snippet below:
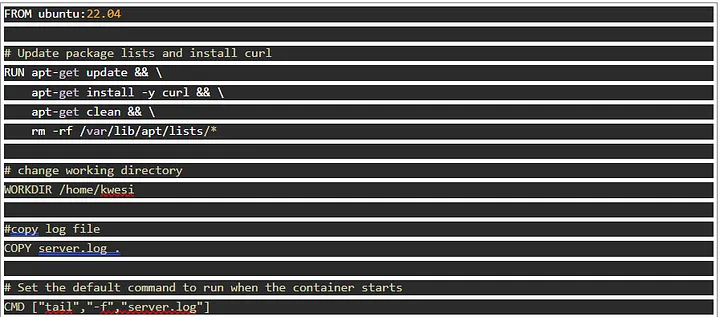
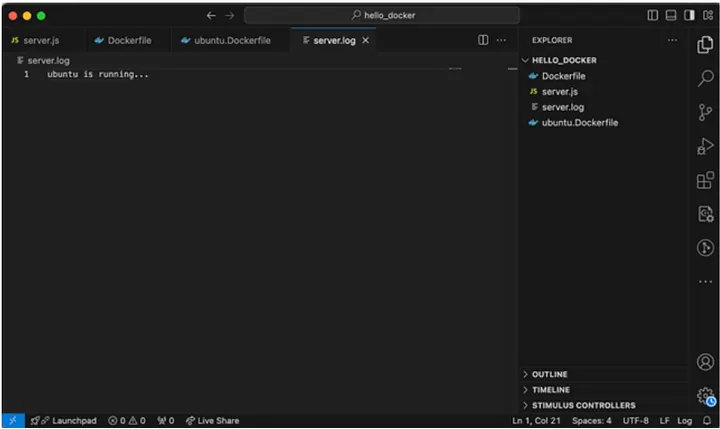
Create a file: server.log and add the text ubuntu is running… or any nice message.
Your folder structure should look like this:
To allow the two containers to communicate, they need to be run in the same network. What does this mean? Have you ever tried accessing someone’s locally hosted application on your device? It wouldn’t work right? Yes. One way to achieve that is to be on the same network, then they expose it over the network, and you access it with their IP.
Let’s create a network. Read more on docker networks here
We’ve added our node server to the network we created. Now let’s build our ubuntu server and add it too. This may take a while. Use it as an opportunity to get a glass of water!
Now that these two containers are up and running on the same network, let’s confirm they can communicate. Let’s open bash in interactive mode inside the Ubuntu server and run some commands.
Without setting the name parameter, Docker will give your container a nice random name. You can always check statuses and info on containers with the command
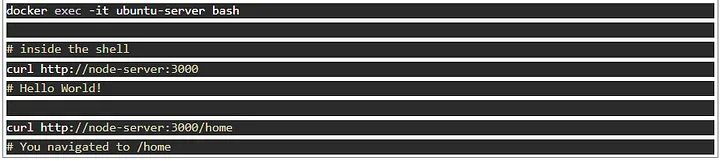
Yes! We automatically get to use the name of the container as a domain name that gets resolved to the container just by adding them to the same network!
Compose the two containers
That’s a lot of commands to keep in mind and rerun every time! How about writing it into a script? That’s where docker-compose comes in.
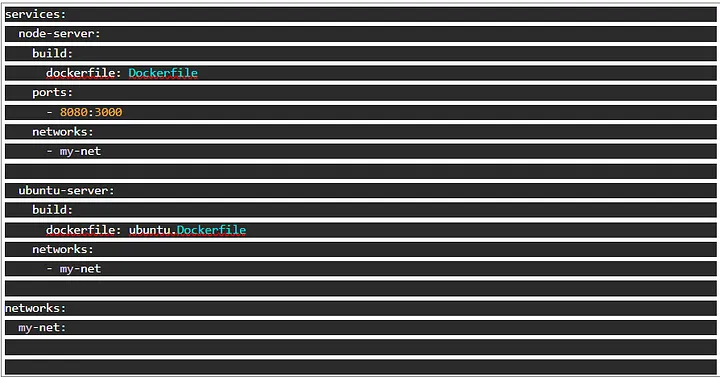
Put the code snippet below in a docker-compose.yml file.
Before we run this, let’s stop and remove our containers.
Explore the command docker stop and docker rm.
We’ll quickly run what will stop the containers but do look at it further.
With just a few commands, we can get things up and running
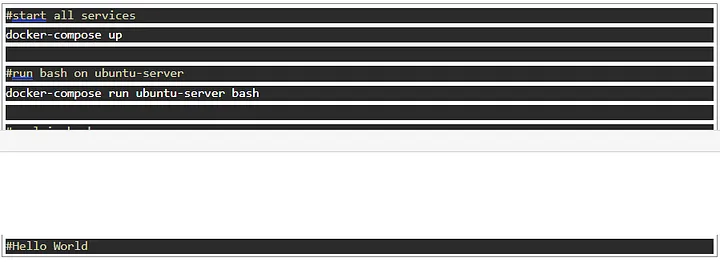
You would have to run the second and third command in another terminal since docker-compose up keeps the terminal busy. You could use the -d flag to make the services run in the background too.
This is the essence of docker-compose. We get to use a simple configuration file, written in yaml, to compose these containers.
Each container is specified as a service with configurations under them.
There are a lot more you can add to the docker-compose file to determine how the containers run.
Tear down this whole set-up with a single command: docker-compose down
Now try checking with docker ps. They’re gone! Beautifully composed!
Hope you had fun going through this with me!
Written by Samson Dadson


